



How to Do Camera-Ready Makeup for Photos and Video
You know that moment when makeup looks cute in the mirror, then your phone camera suddenly has opinions? Rude, but useful. Camera-ready makeup is makeup that holds up under flash, daylight, phone cameras, video calls, close-up selfies, livestreams, reels, and those high-definition moments where every edge gets invited. It is not about piling on product until your face feels heavy. It is about smoother prep, thinner layers, controlled shine, soft dimension, defined eyes, and a finish that works with lighting instead of fighting it. This guide breaks down base, texture, shine control, eye definition, and mastering a photo-friendly finish so your makeup looks polished on camera and still comfortable in real life.
Quick Answer: What Does Camera-Ready Makeup Mean?
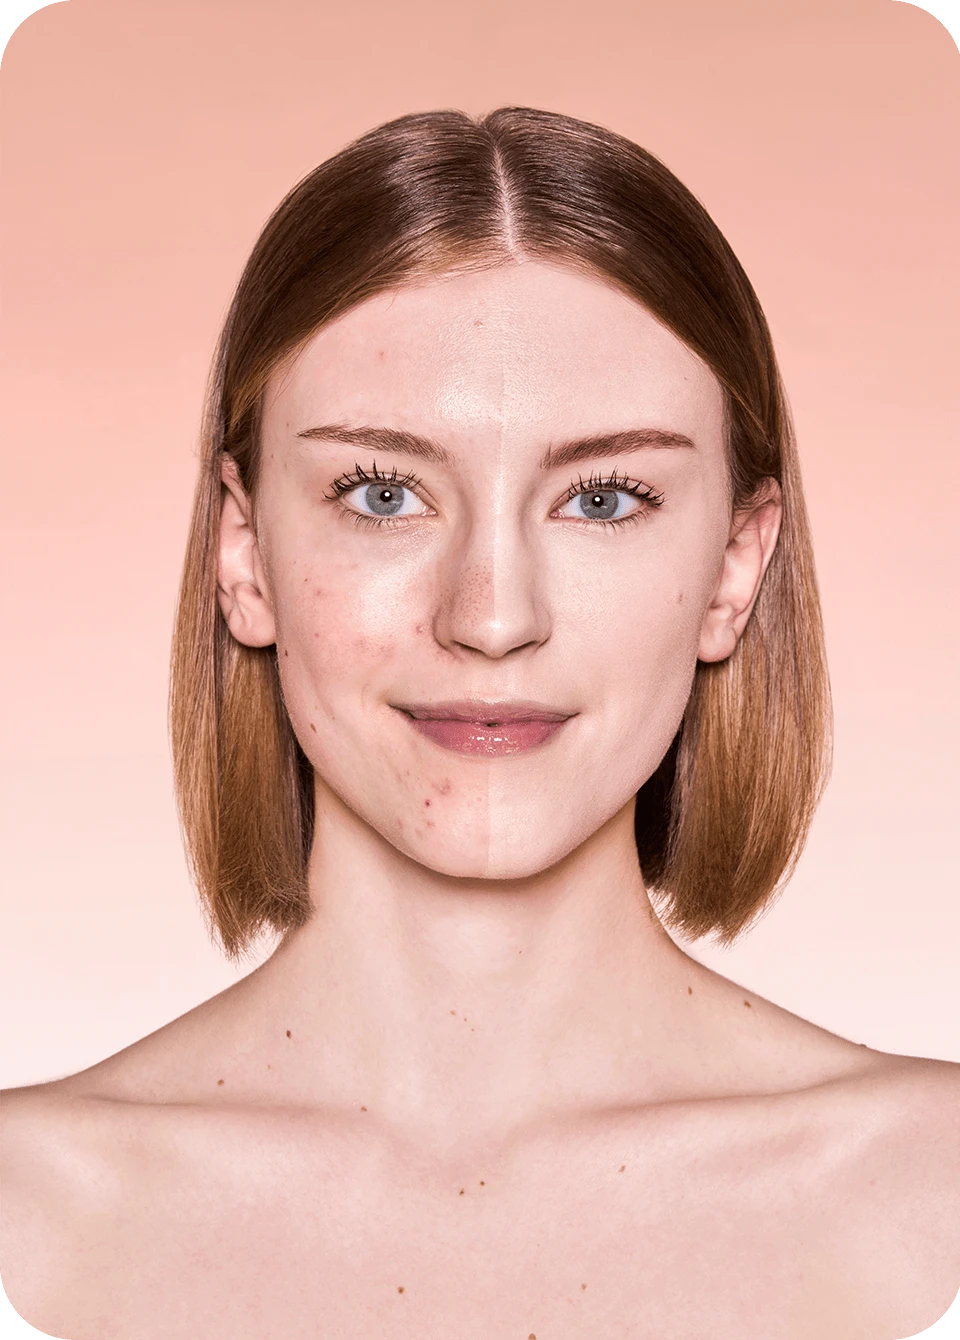
Camera-ready makeup means your makeup is smooth, blended, shine-controlled, and defined enough to show up clearly on camera without looking heavy in person. It usually needs strategic primer, an even base, bright but natural-looking under-eyes, soft dimension, defined eyes, controlled glow, and setting spray. Start texture control early with the Camera On Smooth & Blur Primer, which creates a soft-focus blur, minimizes visible texture, and helps foundation stick around. For targeted smoothing,our Pore Eraser Blurring Stick helps blur the appearance of pores and fine lines, absorbs excess oil, and lets you apply product exactly where texture shows. The best camera-ready makeup looks like you, just clearer, smoother, and more lighting-proof. Think polished skin, visible features, and glow that reads intentional instead of greasy under flash, even when the camera gets really close.

What Cameras Pick Up That Mirrors Do Not
Before makeup touches your face, pick your vibe. Prom glam looks more polished when your dress, hair, lighting, and main feature all work together.
Texture and Pores
Cameras can emphasize texture, pores, dry patches, and uneven layers, especially with flash or close-up video. The fix is not more foundation. It is smoother prep, thin complexion layers, and extra blending around the nose, cheeks, and smile lines. Let skincare settle before base so products do not slide or gather where the camera can see them.
Shine and Flash
Glow and glare are not twins. Glow belongs on the high points of the face, like cheekbones and the bridge of the nose. Glare usually appears through the T-zone, around the nose, or on the forehead. Camera-ready makeup keeps shine controlled in those areas while letting intentional radiance stay soft, fresh, and dimensional on camera.
Feature Definition
Cameras can flatten features, especially in bright daylight, strong ring lights, or video calls. Brows, lashes, blush, and lips may need a little more definition than they do in your everyday makeup. That does not mean harsh lines. It means soft structure: lifted lashes, lightly shaped brows, blended cheek color, and lips that do not disappear on screen.
Camera Ready Makeup Guide
Use this guide as your photo and video checklist. The order matters less than the finish: smooth, balanced, blended, and defined. Work in light layers, pause between steps, and check your face from both straight-on and side angles. Camera-ready makeup is not a race. Think of it as a little editing session for your face, with every product placed where it actually helps. Keep the mirror close, but let the camera have one vote too before filming.
Smooth the Skin Before Base
Start with skincare that makes your face feel comfortable, not slippery. Give your moisturizer time to settle, then smooth primer over areas where makeup usually grabs, separates, or shows texture. Focus around the nose, cheeks, chin, and forehead. If pores or fine lines tend to stand out on camera, use a blurring step only where you need it. Thin prep layers are the secret. Too much product before foundation can make the base move around, especially under hot lights, during livestreams, or throughout a long video day.
Use Thin, Even Complexion Layers
Apply base in thin layers and blend outward so coverage fades naturally toward the hairline and jaw. The Lock & Go Long-Lasting Cushion Foundation gives powerful coverage with a featherlight feel, using transformative liquid to powder tech for a soft-matte finish. It is also waterproof and sweat-resistant, which helps when photos, filming, or events run long. Match your face, neck, and undertone before the real shoot moment. If the base looks perfect straight-on but stops at the jaw, the camera will absolutely tell on you. Blend around ears and hairline when they will show in profile shots too.
Brighten Under-Eyes Without Overloading Concealer
Under eyes need brightness, but not as a thick pale triangle. Place concealer where darkness actually shows, then blend the edges until the product melts into foundation. The Like Magic 12HR Full Coverage Concealer has a soft matte finish with medium-to-full, lightweight, buildable coverage that is made to avoid settling into fine lines or creases. Use less than you think, then add only where needed. Too much light concealer can bounce back against flash and make under eyes look obvious instead of fresh. Keep the inner corner softly blended too.
Control Shine With Strategic Powder
Powder should edit shine, not erase your face. Set under eyes, around the nose, forehead, and chin first. The Insta-Ready Face & Under Eye Setting Powder Duo includes a pressed powder for under eye makeup and a sheer, oil-absorbing loose powder for a fresh, shine-free face. For a softer finish, the Baked Glow Setting Powder is a weightless translucent loose powder with light-reflecting particles that help blur pores, fine lines, and wrinkles. Aim to keep cheekbones fresher so the face stays dimensional. That balance keeps skin polished without killing all natural movement on camera.
Define Eyes and Add Balanced Glow
Camera-ready eyes need definition that reads clearly without looking harsh. Keep liner close to the lashes, then soften edges if the rest of the look is natural. The Pro Precision Waterproof Liquid Eyeliner has an extremely fine felt-tip and a waterproof, pigment-rich formula for precise definition. Add lashes with our All-In-One Volume & Length Mascarao, a dual-ended mascara with quick-drying, smudgeproof formulas that can deliver volume, length, curl, and separation. Place highlight carefully: cheekbones, inner corners, or brow bone, rather than on every surface available. A tiny glow looks chic; a shiny stripe can distract on video.
Photo and Video Makeup Mistakes to Avoid
Camera-ready makeup usually goes wrong because one detail gets too intense or one area gets ignored. Keep these mistakes off the setup list before photos, filming, event glam, or any moment where the lighting is doing unpaid detective work:
- Powdering the whole face until skin looks flat.
- Leaving the jawline unblended before photos.
- Using concealer that is too bright under flash.
- Letting the T-zone turn greasy while cheekbones stay bare.
- Adding harsh contour without soft blending.
- Skipping mascara, then wondering why eyes disappear on camera.
- Using SPF or shimmer-heavy products without testing flash first.
- Ignoring the lighting setup before a video call, shoot, or event.
Do a quick camera test in the actual lighting. Look straight ahead, turn to the side, smile, and check both flash and no-flash if possible, especially before close-ups or client-facing video calls too. One minute of checking can save a whole folder of almost-right photos.
Quick Touch-Up Plan Before Photos
Touch-ups should be tiny and strategic. Blot first, powder second. If you apply powder directly over oil, texture can look heavier on camera. Check the sides of the nose, center of the forehead, chin, and under eyes. Then check your lips, brush the brows back into place, and tap on more cheek color only if the face looks washed out. For content creators, event photos, and video calls, keep a mirror, blotting paper, lip color, and a small powder nearby. Do this before thumbnails, interviews, flash portraits, or any close-up moment, not after. If your makeup looks too powdery, mist lightly with the Camera On Blurring Waterproof Setting Spray, it’s an ultra-light setting spray made for waterproof, sweatproof, smudge-resistant wear that keeps makeup smooth, fresh, and camera-ready.
Conclusion: Makeup That Works With the Camera
Camera-ready makeup is not about covering every inch of skin. It is about smooth prep, controlled shine, blended edges, and strategic definition that helps your features show clearly in photos and video. Build the base in thin layers, brighten under eyes carefully, powder only where shine needs help, and define eyes and lips enough for the lighting. Then test the look in the same setup before the real photo or video moment. For more base help, read our How To Apply Foundation blog and keep your next close-up calmly under control.
FAQ
1.What does camera-ready mean?
Camera ready means makeup is prepared for photos or video. The skin should look smooth, shine should be balanced, edges should be blended, and features should have enough definition to show clearly on camera. It is not the same as heavy makeup. The best camera-ready makeup still feels wearable in person while holding up under flash, daylight, phone cameras, close-up shots, quick video clips, selfies, and bright event lighting too.
2.What are the best camera-ready foundation types?
The best camera-ready foundation types are flexible, buildable formulas or cushion bases that can be layered thinly. A soft-matte or natural finish usually photographs well because it controls shine without making skin look flat. Avoid bases that look heavy, separate under bright light, or stop suddenly at the jawline. Matching undertone and blending into the neck matter just as much as coverage for photos and video from every angle too.
3.How do I stop makeup looking oily in photos?
Blot first, then powder shine-prone areas like the forehead, nose, and chin. Keep glow on high points, such as cheekbones, so the face looks fresh instead of greasy. Use thin base layers, avoid overloading skincare right before makeup, and finish with setting spray. Before photos, check your T-zone in the actual lighting because flash can make shine look stronger very fast. A tiny touch-up always beats another heavy powder layer.
4.Does makeup look different on camera?
Yes, makeup can look different on camera because cameras capture light differently than mirrors. Flash, daylight, and phone cameras can flatten features, emphasize shine, highlight texture, and make color appear lighter than expected. That is why camera-ready makeup focuses on smooth blending, balanced shine control, and slightly more definition around the eyes, brows, and lips while still looking comfortable in person. That is why testing matters before the real shot starts.
5.Why does my makeup look washed out in photos?
Makeup can look washed out in photos because bright lighting and camera exposure reduce contrast. Blush, bronzer, liner, and lip color may look softer on screen than they do in the mirror. Use buildable color, define the eyes and brows, and keep the complexion balanced. A quick photo test before the real moment helps you add shape without overdoing the makeup. Small adjustments can make the face read much clearer.